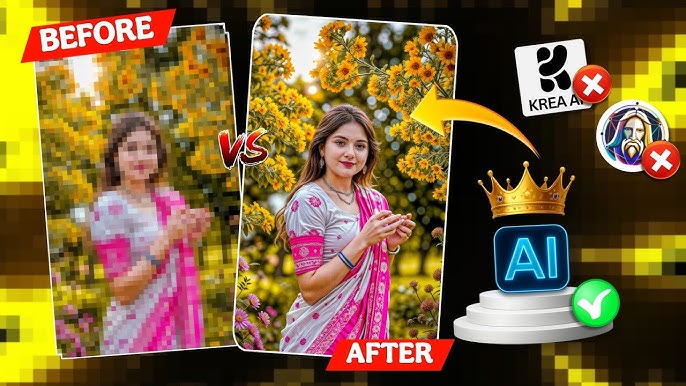
In today’s digital world, image quality matters more than ever. Whether you’re a content creator, photographer, designer, influencer, or business owner, high-resolution visuals can instantly boost your credibility and engagement. One of the most searched topics right now is how to convert your photo into 16K HD quality.
But is it really possible to transform a low-resolution image into ultra-high 16K resolution? The answer is yes — with the help of modern AI upscaling tools.
In this complete guide, you’ll learn:
- What 16K resolution actually means
- How AI photo upscaling works
- The best tools to convert photos into 16K HD quality
- Step-by-step instructions
- Pro tips for professional results
- Common mistakes to avoid
Let’s dive in.
What Is 16K Resolution?
Before converting your photo, it’s important to understand what 16K actually means.
16K resolution typically refers to an image that is approximately:
15360 × 8640 pixels
That’s four times the resolution of 8K and sixteen times higher than 4K Ultra HD.
To put it simply:
- 1080p = 2 million pixels
- 4K = 8 million pixels
- 8K = 33 million pixels
- 16K = 132+ million pixels
This level of resolution provides:
- Extreme sharpness
- Incredible detail
- Professional print quality
- Future-proof clarity
However, simply resizing an image doesn’t create real detail. That’s where AI comes in.
Can You Really Convert Any Photo to 16K?
Technically, yes. Practically, it depends on:
- The original image quality
- Lighting conditions
- Focus sharpness
- Compression level
AI tools use machine learning algorithms trained on millions of images. They don’t just stretch pixels — they predict and recreate realistic details.
This process is called AI Image Upscaling or Super Resolution Enhancement.
How AI Converts Photos to 16K HD Quality
Modern AI photo enhancers use:
- Deep learning neural networks
- Edge detection systems
- Texture reconstruction algorithms
- Noise reduction models
Instead of pixel duplication, AI:
- Analyzes the structure of the image
- Identifies patterns
- Rebuilds missing details
- Enhances textures naturally
The result looks far more realistic than traditional resizing.
Best AI Tools to Convert Photos into 16K HD Quality
Here are the top tools used by professionals in 2026:
1. Topaz Gigapixel AI
One of the most powerful AI upscaling tools available.
Features:
- Upscale up to 600%
- Face recovery technology
- Noise reduction
- Batch processing
Best for:
- Photographers
- Print designers
- Professionals
2. Adobe Photoshop Super Resolution
Photoshop includes AI-based upscaling via Camera Raw.
Features:
- AI Super Resolution
- Smart sharpening
- Professional color correction
Best for:
- Graphic designers
- Advanced editors
3. Let’s Enhance
A web-based AI upscaling tool.
Features:
- One-click enhancement
- Automatic color correction
- Upscale up to 16K
Best for:
- Beginners
- Quick edits
4. Remini AI
Popular for:
- Face enhancement
- Social media photos
- Portrait restoration
5. Fotor AI Upscaler
Simple and beginner-friendly.
Step-by-Step Guide: Convert Your Photo into 16K HD Quality
Now let’s go through the complete process.
Step 1: Choose a High-Quality Original Photo
The better your starting image, the better the final result.
Make sure:
- The photo is not heavily compressed
- The subject is in focus
- Lighting is decent
AI cannot fully fix extremely blurry images.
Step 2: Select the Right AI Upscaling Tool
For maximum quality, use:
- Topaz Gigapixel AI (desktop)
- Or Let’s Enhance (online)
Upload your image.
Step 3: Set the Resolution to 16K
Most tools allow custom resolution settings.
Manually set:
- Width: 15360 px
- Height: 8640 px
Or choose maximum upscale percentage.
Step 4: Enable Detail Enhancement
Turn on:
- Face recovery
- Texture enhancement
- Noise reduction
- Sharpening controls
These options improve realism.
Step 5: Preview Before Exporting
Always zoom to 100% and check:
- Edges
- Skin texture
- Hair detail
- Background clarity
Avoid over-sharpening.
Step 6: Export in High-Quality Format
Recommended formats:
- PNG (best quality)
- TIFF (professional print)
- High-quality JPG (for web)
How to Convert Low-Resolution Photos to 16K (Old Images)
If you’re working with old photos:
- Use AI restoration tools first
- Remove noise
- Fix scratches
- Then upscale
This two-step process produces better results.
Best Settings for Different Photo Types
Portrait Photos
- Enable face enhancement
- Moderate sharpening
- Soft skin detail
Landscape Photos
- High texture enhancement
- Strong edge recovery
- Balanced contrast
Product Photos
- Maximum sharpness
- Clean background
- High clarity
Why Convert Photos to 16K HD Quality?
1. Professional Printing
Large banners, posters, billboards require high resolution.
2. Cropping Flexibility
You can crop without losing quality.
3. Future-Proofing
Higher resolution ensures longevity.
4. Stock Image Sales
High-res images sell better online.
5. YouTube Thumbnails & Social Media Branding
Sharper visuals attract more clicks.
Common Mistakes to Avoid
Over-Sharpening
Too much sharpening creates unnatural textures.
Prompt:
Enhance the uploaded image into ultra-detailed, photorealistic realism while preserving its original composition, emotion, and identity. Do not beautify, stylize, or idealize the subject.Introduce authentic real-world imperfections: natural asymmetry in facial features and body posture, subtle unevenness in eyes, eyebrows, lips, and bone structure. Add realistic skin texture with visible pores, fine lines, tiny blemishes, slight discoloration, uneven tones, and micro-shadows. Avoid smooth or plastic skin completely. Improve clarity and depth without over-sharpening. Enhance micro-details such as individual hair strands, flyaways, fabric fibers, wrinkles, dust, wear, fingerprints, reflections, and environmental imperfections appropriate to thescene.Replace artificial or “Al” lighting with believable real-life lighting based on the scene: natural falloff, imperfect shadows, soft highlights, realistic contrast, and subtle light color shifts.Lighting should feel accidental.
Expecting Miracles
AI enhances — it doesn’t recreate missing reality perfectly.
Using Low-Quality Originals
Garbage in = garbage out.
Ignoring Color Correction
Upscaling doesn’t fix bad colors automatically.
Pro Tips for Ultra-Realistic 16K Results
- Use RAW images when possible
- Apply slight noise before sharpening
- Adjust contrast manually
- Use manual masking for faces
- Combine AI tools for best results
Is 16K Necessary for Everyone?
Not always.
Use 16K if:
- Printing large banners
- Creating cinematic content
- Selling stock photography
For social media, 4K–8K is usually enough.
How Long Does It Take to Convert to 16K?
Depending on:
•PC performance
•GPU power
•File size
It can take:
•1–10 minutes per image
Online tools may take longer.
Is 16K Supported Everywhere?
Not all platforms support 16K uploads.
Most social platforms compress images.
Use 16K mainly for:
•Printing
•Archiving
•Professional editing
Future of AI Image Enhancement
AI technology is rapidly evolving.
Soon we’ll see:
•Real-time 16K video upscaling
•Automated detail generation
•Smart texture recreation
•One-click professional enhancement
AI is making professional-grade image quality accessible to everyone.
Final Thoughts
Converting your photo into 16K HD quality is no longer limited to professional studios. With AI-powered tools, anyone can upscale images to ultra-high resolution with impressive detail and clarity.
Remember:
•Start with the best original image
•Use reliable AI upscaling tools
•Avoid over-editing
•Export in high-quality formats
High-resolution images are the future of digital content — and mastering AI upscaling gives you a powerful creative advantage.
For More Relative Articls Visit